ANZ's Farms


Showing posts with label garden. Show all posts

Friday, May 25, 2012

Onions and Garlic

My onion harvest
My garlic harvest
You might say there has been a learning curve to my gardening ... a big one! Before starting to homestead, my notion of growing food was limited to what I saw as a child -- plant in April/May after the danger of frost was over. Then tend, water, harvest and eat throughout the summer. Once September rolled around, the work was done until the next spring.

So the idea of planting in the fall for a spring harvest was definitely thinking outside the box for me. It's hard to teach an old dog new tricks, but I had faith that if the garden centers were selling onion sets in October, it must be the way to do it. So I planted 3 rows of onions and 2 rows of garlic last fall. The green tops stayed healty during the winter. Go figure. And then the question arose -- what next? Here is a photo guide of what I learned:
Harvest onions when they start to show and the tops fall over

Harvest garlic when the leaves begin to yellow and the bulb is a good size

Support the bottom of the plant as you pull it out
Garlic roots are deeper and stronger than onion roots

Dust off the dirt and dry in the sun before storing in a cool, dark place

Thursday, May 24, 2012

Berries by the Month

Raspberries in May
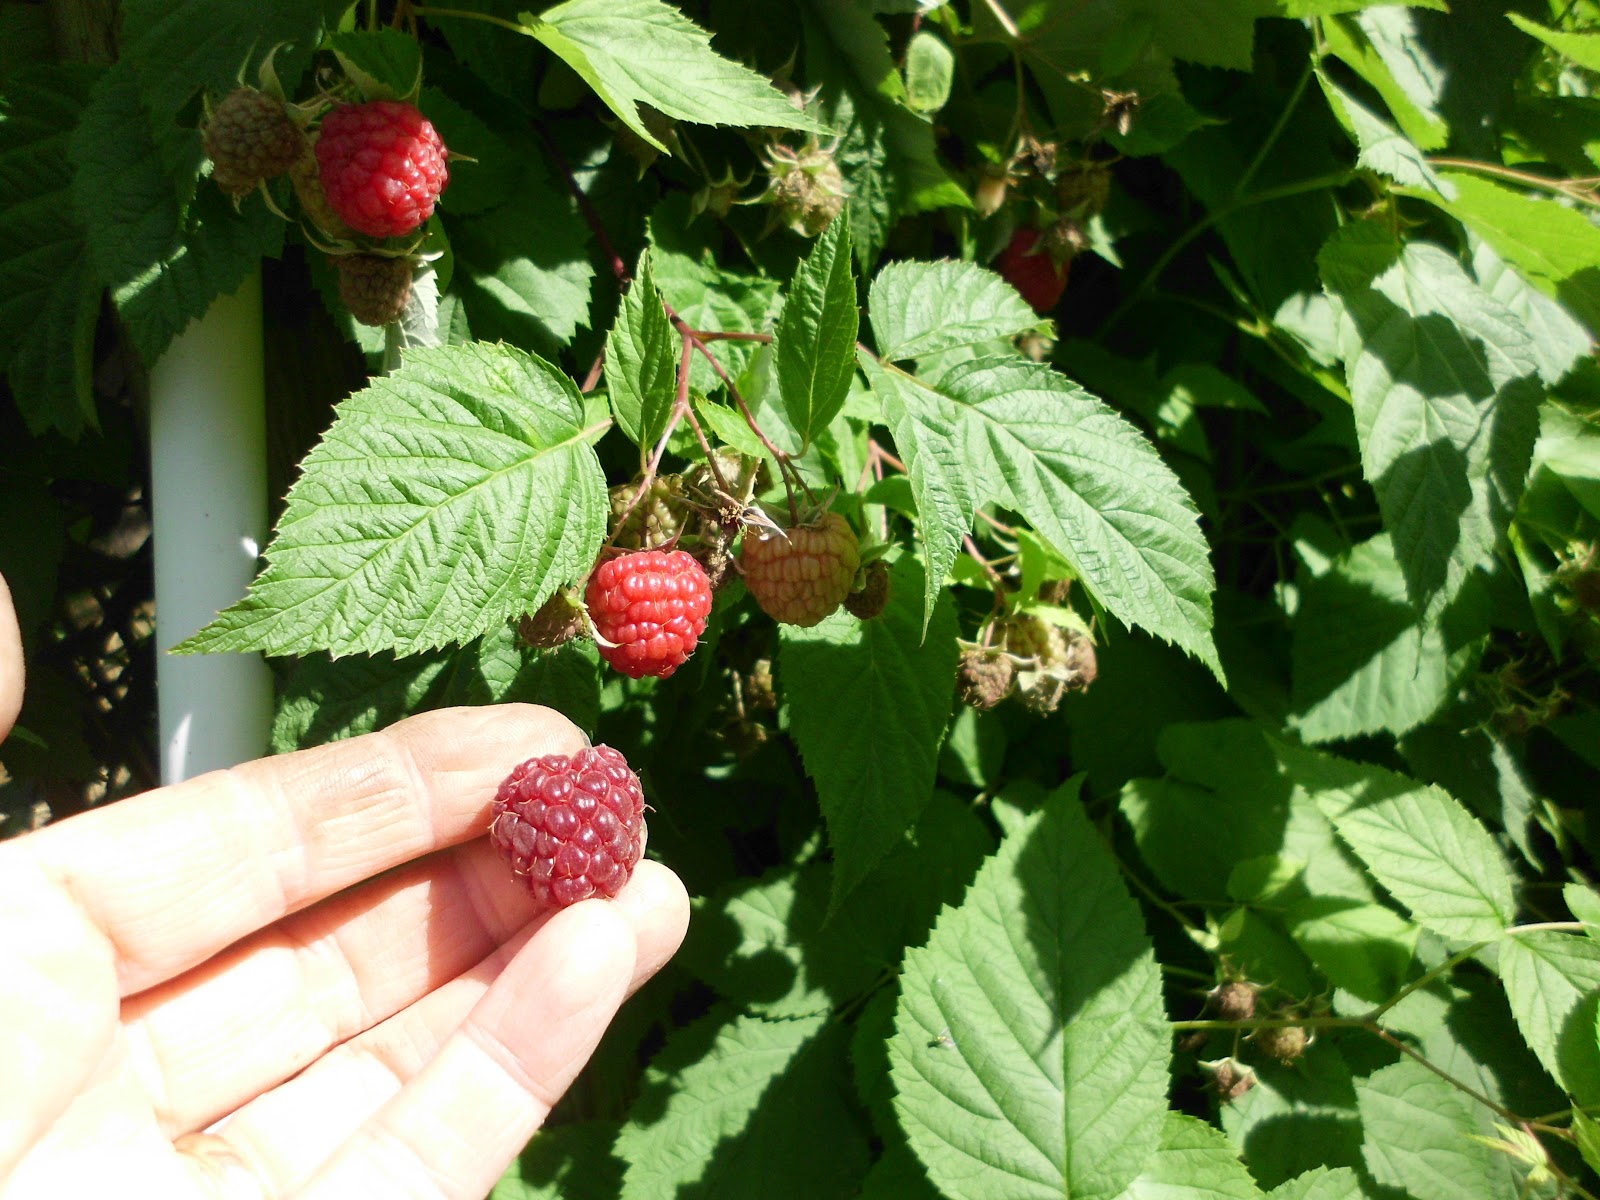
Yummy raspberries! Our two bushes are producing an abundant supply for sprinkling on breakfast cereal or stirring into homemade goats' milk yogurt, and just plain eating. It has become my daily ritual to go back out after milking and harvest a bowl full of this delicious, juicy fruit. It's important to wait until the berry turns from red to crimson before plucking. The picture shows the difference in color between ripened perfection and not quite ready. Another way to tell: a ripe berry will fall into your hand when gently pulled. If it continues to hold to the stem, give it another day.

Raspberries are very perishable and only keep a day or two in the refrigerator. They can be stored for up to a year frozen. (Place unwashed, dry berries in a single layer on a cookie sheet in the freezer. Once hard, place in an airtight container and return to the freezer.) Here is a copycat recipe from Food.com for Cheesecake Factory Raspberry Truffle Cheesecake. I substitute my goat cheese for the cream cheese -- ounce for ounce. Can't wait to try this recipe.

I am surprised the birds have left us so many berries. It seems robins spend their day either on the ground next to the bushes or on the wire strung for support. Maybe they are leaving the raspberries because they are too full from eating my blackberries. I did get to pop one blackberry drupelet into my mouth yesterday ... it was delicious!

Our little homestead is providing a different fresh berry each month. Reminds me of those catalogs where you can purchase the fruit of the month to be sent to you fresh. Only this is way better! I've already blogged about strawberries. We enjoyed them in April this year. (Due to the warm winter and early spring, everything is early.)

Next up are the blueberries. They have tiny, unripe berries.
Blueberries in June

After that, the elderberries should be ready. They are in full bloom right now.
Elderberries in July

Tuesday, May 8, 2012

Gardening God's Way

The subtitle for the Back to Eden film ought to be "Gardening God's Way". This documentary, free for viewing at their web site, is worth every minute you spend watching ... all 103 of them. It tells the story of a man who grew up in a gardening family in Souther California, but moved to the Olympia penisula in WA state to raise his own family. The 213-foot deep well they dug only produced 1/2 gallon of water per minute. He knew right away that irrigation for his gardening endeavors was out of the question. Yet, as he testifies, it was the greatest blessing he could have received. At the end of himself, he turned to God and asked how it would be possible to grow food to feed his family without water. The video is about God's answer to him and the results when he followed God's lead.

Peppered with scriptural application, how-to explanations, practical advice and examples of how other gardeners have been successful using these principles in other climates, the film is a must-see for anyone who wishes they could garden like Adam and Eve, back in Eden, before
Cursed is the ground for your sake;
In toil you shall eat of it
All the days of your life.
Both thorns and thistles it shall bring forth for you ...
Genesis 3:17-18a, NKJV

Monday, May 7, 2012

Multiplying Berries

It worked! I'm so excited! Thanks to Kendra at New Life on a Homestead! Her blog post, Propagating Elderberry Bushes, inspired me to try starting some elderberry bushes from my cuttings. The results are pictured here.
Elderberry bush cutting

Let me tell you about the day I did this. My wonderful neighbor Heather came for a visit. I showed her my latest adventure in gardening, this propagating-new-plants-from-prunings idea. She laughed. Not the response I was expecting. Then she told me that her mother had done this ... without success.  She and her dad had laughed at her mother, too. Frankly, I had tried this before with other prunings and had the same outcome as her mother. So I wasn't expecting much.

Fast forward to today, about 8 weeks later. I have 4 new elderberry bushes that are thriving! It was so easy -- a pot, some good composted dirt and the cutting. I followed Kendra's instruction to lop off the top of the cutting and bury the stem up to the second set of leaves. I didn't use root accelerator or anything fancy. Once potted, I placed it in the green house (I pruned in February, so it needed protection from freezing/frost). I kept the soil damp with frequent watering. 

At first, the existing leaves withered and the experiment looked like a failure. But I persevered and my efforts have paid off, in more ways than one. I am sharing in the work of The Creator, and have a great sense of accomplishment in bringing forth new life. Plus, given that I paid $15 each for the original bare root plants, the calculator in my head heightens my joy.

Last week, armed with confidence from this adventure, I dug up some of my raspberry bushes and potted them, roots and all. Even if the plants don't live, it was a necessary thing to do. These volunteers had taken root in the garden, migrating from the nearby berry patch. My husband's saying -- "A weed is a plant out of place." -- really helps me keep perspective when the need to "kill" a plant arises.

So, berry bushes are multiplying around here.  Now, with a little patience, berries should be multiplying around here, too. I hope to enjoy the fruit of my labor in the years to come.

Thursday, April 5, 2012

Strawberries

'Tis the season! The long-awaited season for fresh strawberries. Due to our whacky weather, strawberries are ready now and I picked some yesterday. Enough to make jam. A big batch. Here is a picture of my camera-shy partner in crime Breanna, out of school on spring break, with me at Hunts Strawberry Farm.

However, for periodic eating, I have my own little patch of ever-bearing strawberries. They don't produce alot, but they provide a steady supply for my salads, cereal and yogurt. My strawberry patch used to be in the big garden, but I transplanted the two-year old plants to the south side of the house in the walls of my cold frame ... stealing the idea from Logan's Trading Company. (What a great place to go, a place to receive inspiration!)

Lemon Balm


If you haven't grown lemon balm, I recommend you try it this year. What a delightful herb! Perennials are a favorite since they provide a harvest year after year, but this one provides enough to divide the plant and share with friends and family, too.

My favorite use is leaves in my tea, either when I steep it or in the glass with ice. But there are so many other practical uses. Here are two great resources with culinary, medicinal, household and cosmetic recipes for lemon balm: Old Fashioned Living and New Life on a Homestead blog post. Enjoy!

Saturday, July 23, 2011

Asparagus Beans

Look at my colorful harvest! The Dr. Wychie yellow tomatoes are ready. They are an heirloom variety that are as delicious as they are beautiful -- they give tomato dishes an interesting (in a good way) color. The Carolina Wonder bell peppers are now red on the vine and the Pimiento peppers continue to be heavy producers. My goal today is to make some Pimiento cheese spread.

But the most delightful vege from the garden these days is the prolific Asparagus Bean. The seeds were given to my by a Chinese egg customer. I had no idea what to expect, but whatever expectations I harbored have been exceeded greatly by this unusual plant. The beans are over a foot long and hang on the vine where they can easily be seen and harvested. Many of my plants play hide-and-seek with me for their produce, but this plant puts the goodies right out there. A little twist to release them and they are in the basket. I use them just like string beans. One bean makes a palm full of 1-inch slices ready to go into the pot or canning jar.

I am definitely saving seed from this new friend to enjoy for summers to come.

Friday, July 22, 2011

Armenian Cucumbers and Peanuts

The world comes to my doorstep through international egg customers. I love it, altho communicating beyond "Hello, how are you?" can get muddled sometimes. That's when a smile and nod say all you need to say.

This winter, I asked each customer to share seeds from their home-country favorites. Putting the seed in the dirt, watering and watching them grow has been the easy part. I didn't anticipate how tricky it would be to know when to harvest. I happily presented my Slavik friend with the first fruit of her contribution, to which she wrinkled up her nose and said, "Too big! Too big!" These "yard-long" cucumbers are actually best if harvested before they get a yard long, according to my customer. Altho they taste just like our Southern varieties, they don't turn dark green, their skin is never peeled before eating and they are naturally burpless.

My peanut plants are doing well. I researched on the internet to figure out when to harvest and learned the most amazing thing. Peanuts are not root crops as I have always believed ... the blossoms send shoots down into the ground on which the peanut actually grows. After reading this, I headed straight out to the garden to see for myself. Sure enough, the blossoms have brown spikes reaching down, some long enough for their ends to be embedded in the soil. I hope you can see them in this picture. Now I need to finish the article and learn when peanuts ripen and are ready to harvest. Jordana shared that she loves peanuts because of the way they return nitrogen to the soil ... whatever she plants after the peanuts thrives.

I am learning so much. Sometimes I wish I had selected a different major in college so I wouldn't be such a late bloomer (bad pun!). However, much of the joy is in the timely discovery of these morsels of knowledge. O, the wonder of creation!

Tuesday, March 29, 2011

The Last Frost?

Ghosts! Or at least that's what my neighbor called my fruit trees covered with sheets. I'm thankful I resisted the temptation to plant when the weather was so nice and the fruit trees started to bloom because we had freezing temps last night and frost on the ground this morning. Could this have been our last frost? I sure hope so, because I am ready to empty the greenhouse and put those beautiful heirloom plants into the prepared soil of my garden.

I have more plants than garden space, so I will be selling the plants I don't have room for. $3 for a 3" peat pot. Quantities are limited but if you want some, let me know ASAP. I have extras of:

Tomatoes:
    Cherokee Purple (purple -- of Cherokee Indian origin)
    Dr. Wychie's (yellow -- tropical, sweet taste)
    Roma & Amish Paste (good for making sauce)
    Gold Medal (striped -- sweet and mild, great for eating fresh)
    Good Neighbor (red --  a good one to share with your neighbors)
    Tappy's Heritage (red -- meaty and delicious)
    one or two other red varieties: Mortgage Lifter, Brandywine, Delicious

Sweet Bell Peppers:
   Carolina Wonder (green)
   Corona (yellow/orange)
   Chocolate

Hales' Best Muskmelon (canteloupe)

Horace Boyette Burpless Cucumber

Squash:
   Early Prolific Straightneck (yellow)
   Zucchini (dark green)

I planted only heirloom varieties of seeds ... no genetically modified ones will take root in my garden. I saw a video this week entitled The Future of Food. I knew GMO's were "bad", but this really spelled it out for me. Did you know that the only way to get a gene splice into a cell is on the back of a virus or bacteria? So GMO's not only have their DNA tampered with, they have bacteria/viruses in each cell and antibiotics added to kill the organism. Most GMO's are modified to withstand the pesticides sprayed in the fields to kill the weeds, so you can bet GMO plants are not organic either.

Saturday, February 12, 2011

Progress

Sometimes it's hard to see progress. My to-do list seems to grow in spite of being busy all day. So I want to take a minute to celebrate the progress I can see.
Things are growing here!

1. the bunnies! We discovered that Nut was Honey and Honey was Nut! So the one with the white spot on his nose is the buck. They are enjoying their new hutch outside during the day. We are still bringing them in each night as long as the tem is below freezing. The ziploc bag of their fur is growing as I groom them each day :)

2. the seedlings ... wow, look at what has happened in a week's time! I have planted more seeds, for staggered growth as well as more types of plants.

3. goat babies! Little One looks ready to go any day. Everything is ready ... I cleaned out the goat barn down to the dirt, limed and spread fresh hay bedding. I even scrubbed the milking stanchion and spools they climb on. My kidding supplies are gathered by the front door. The baby monitor crackles in my ear on my bedside table to alert me during the night if anything is happening out of the ordinary in the goat barn. Here's a picture of Mamma sunning herself this afternoon while I cleaned. Look at that belly!

Wednesday, January 12, 2011

January to-do List

#1- Order seedlings. So many possibilities! As I peruse my two favorite seed catalogs -- Baker Creek Heirloom Seeds and Southern Exposure Seed Exchange, which arrived in the mail during the holidays -- the words from The Urban Homestead keep ringing in my ears: "every plant counts". Each plant must have a purpose whether it is to eat, share, sell or experiment. I usually try at least one experiment each season ... a plant I haven't grown before. Last year it was pumpkins (that was a HUGE success) and a large variety of new herbs (much less successful! I think I bit off more than I could chew. Plus, many of the seedlings died of neglect because I was undecided for too long about where to plant them.)

One strategy for choosing which plants to grow is what I call Recipes in Reverse. I am keeping a journal, noting the ingredients of the foods I prepare most often, and making my list from that. For example, a salsa garden will need tomatoes, green peppers, jalapeƱos, cilantro, onion and garlic. A soup garden needs lots of different kinds of beans, carrots, onions, potatoes, celery and herbs like parsley and thyme. An Italian garden, my favorite, requires Roma tomatoes, basil, oregano, garlic and onions. I am taking inventory of 2010 seeds I saved and 2009 seeds I have left over, and plan to place my order by the end of the week.

#2 - prepare for seedlings. The plastic walls of my homemade greenhouse deteriorated in the hot summer sun. Bummer. To restore it, we will have to dismantle the frame and re-apply the expensive plastic. I am not up for that since it looks to be an annual event. I have watched craigslist for a used greenhouse because my budget will not accommodate the new one I want (about $800). So, ever coming to my rescue, my wonderful husband has made a seedling station in his man cave (the heated space behind the garage where his stuff goes). He built a table on which the seedlings will rest with T12 fluorescent lights on chains above it. As the seedlings grow, I can raise the lights to keep them the recommended 4" above. The temperature is kept at 60 degrees and water is available from the sink. Everything seedlings and urban farmers need to be happy. I need to organize my left-over peat pots and potting soil, and buy what I need for this season.

#3 - prune and mulch fruit trees. Check

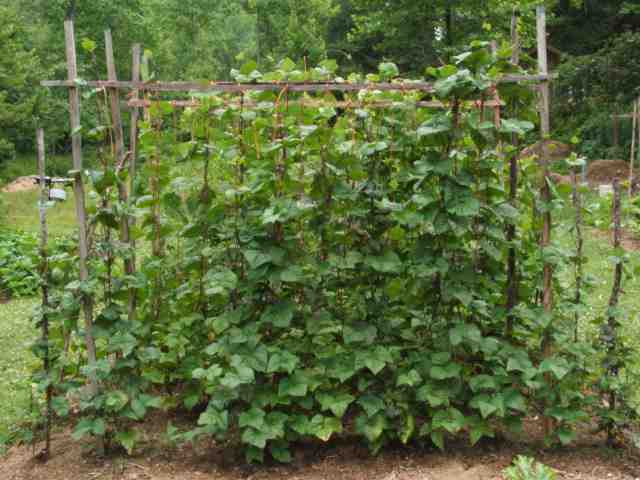
#4 - prune grapevines. I will wait until the end of the month to do this. I hope to have enough vine to use as trellis for climbing plants like beans and cucumbers. I saw a set-up, pictured here on http://www.permies.com/ that uses twine dangled from a crossbar as a trellis. If I use grapevine instead of twine, I can throw the whole thing into the compost pile at season's end.

The rest of the month is spent keeping animals warm, fed and watered. This can be a challenge as the water freezes during the day, not just overnight, during this unseasonably cold winter. The caloric need of the animals increases to help stay warm while their ability to graze and browse decreases, with snow and ice on the ground. I refill the hay bins and chicken feeders a couple times a day. And cleaning up manure frozen to the ground calls for creativity and perseverance as well.

Tuesday, November 23, 2010

Cold Frames

Summer is my comfort-zone time for vegetable gardening. I grew up with a summer garden in my back yard, tended expertly by my grandfather. I can remember his coming through the back door at 6 a.m., laden with fresh corn, butter beans (that my sister and I would have to shell before we could go swimming), tomatoes, cucumbers and other delicious vegetables. I didn't have an appreciation for his labor or the smell of the soil at that age, but I know it influenced me nonetheless.

I came back to my roots once I owned a home and had soil to call my own. I planted a vegetable patch each summer, and learned by trial and error since I hadn't paid attention as a child. It was hard as a single career woman. I laugh now when I think about the time I brought home two bales of straw in the tiny back seat of my Mustang convertible. I had to put the top down to even get them in the car! So you can imagine the new heights my gardening achieved when I married Scott. Our first summer garden together was one of the best I ever had. His know-how and work ethic, combined with the benefits of a truck and a big load of composted horse manure, resulted in an incredibly prolific garden.

I'm back to the trial-and-error method of gardening as I expand to cool weather vegetables and cold frames. I am definitely out of my comfort zone, but reading and experimenting help. Lessons learned: 1) Brussel sprouts and broccoli are too tall to put in a cold frame. I'm trying them in the exposed garden this year. 2) Swiss chard is delicious and hardy ... and very colorful. Grow alot of that. I like it fresh in a salad or wilted in a little bacon grease in the skillet. 3) The sun doesn't reach vegetables planted too close to the south side of the cold frame. 4) Don't forget to close the lid at night when freezing temps are expected and don't forget to open it when it is predicted to be an unseasonably warm day. 5) Fresh lettuce from your very own cold frame on Christmas day is reason enough to go to the trouble again next year.

I have two cold frames now, pictured here. In the foreground is the original one I had last season. It is made of treated lumber insulated with styrofoam. The other one Scott built using a storm door from Habitat and a cinder block box to match, with treated lumber scraps to make the angled top. I got the idea for a cinder-block raised bed from Logan's; they have one displayed there. I found the blocks made the soil too hot this summer for the root plants I tried (primarily garlic and onions). I'm hoping the block sides will mean warmer soil this winter, better than the insulated wood sides of the original cold frame. An experiment whose results will come in time.

In the newer cold frame, I have Romaine lettuce planted in September, parsley left over from the summer season, oregano and thyme. This is the first time I have planted perinneal herbs in the cold frame. (I wonder if extending their growing season and not giving them a winter's rest will effect them adversely. We'll see.) In the other cold frame is iceberg lettuce ... and space for something else. I'd better decide soon and get it planted.

Tuesday, November 9, 2010

The Garden Zone Project

The new garden area is in! Scott has been working hard the past several days building it. Plans began to come to fruition last Wednesday when he got 6 30-ft telephone poles from the Progress Energy place next to the Mudcats stadium in Zebulon. A friend with a big truck and trailer took him, and helped load and unload. Thanks, Mike!

After cutting and piecing the poles together to create a 60'x30' area, he made posts with the left overs. Next, he installed the perimeter fence using 3-ft welded wire, but it looks taller since he stapled it to the top of the poles. Then he built gates for both sides so that I can enter easily from the greenhouse or goat yard. The last step was to place wildlife netting over the top, strips sewn together and to the fence with fishing line. This will serve to keep the chickens in and chicken hawks out while they scratch up the ground for us.

An important part of the overall plan is the tunnel from the chicken coop to the new garden area. We want the chickens to get in and scratch up the ground for us. An added benefit will be the sun they can get this winter (their coop and chicken run is in the shade, which is good for summer, but not for winter). We decided to build a tunnel from the existing coop to the garden area instead of a whole new coop to keep stress/change at a minimum for the birds. They have loved eating the worms and tasty treats along the tunnel so far, as pictured here. One girl keeps escaping ... we can't find where she gets out, but we find her scratching around in the back yard several times a day. A Houdini chicken!

As I expect the birds to spend alot of time in the garden area, I have placed a nesting box there for them. It's a milk crate on a cinder block so it is off the ground several inches, covered with an old sheet and piece of plywood to give them a secure feeling and protection from the elements. There is also a bit of sheet over that corner to give them some shade. This picture shows the "door" from the tunnel into the garden area ... and some of the girls already checking things out!

Here is a picture of the completed project. Completed up to this point, that is. We won't add the truckloads of dirt until late winter and seedlings until spring.

Total cost has been about $180 - $100 for the 2 rolls of 3x100 ft wire fence, $10 per gate for materials to make them (instead of buying them pre-made for $35 each) and $60 for the 3 rolls of 7x100 ft netting. The poles were free, a big savings over the 2x8's we originally planned.

Monday, September 13, 2010

Pumpkin Pie

The pumpkin plant found its way into my garden on a whim ... just something to do with the space left after I harvested the potatoes. Serendipity -- What amazing results. From this one plant, I have:
1. learned that I am not a disciplined gardener (see blog post below). I aspire to do better.
2. grown a birthday present for my 23 year old niece that she is tickled to receive. (Who knew?!) Her present is to come over and pick a few.
3. free fall decorations. Add a couple of pumpkins to a bale of hay or two -- Happy Autumn! Too bad I gave the corn stalks to the goats to eat.
4. tackled a fear. I hate to admit that I fear most new experiences. Mental self-arguments over the irrational nature of the fear do little to overcome the paralysis. Yet, I took pumpkin and knife in hand and set out to make a pumpkin pie from scratch. I am inordinately proud because the outcome is so much more than a delicious pie .. it is a victory for my self-esteem. Riding on the tide of this victory is my venture into uses of banana peppers which are growing even better than the weeds in my garden. I hope to blog soon about crab-stuffed baked peppers that are on the menu for tonight.

Friday, August 13, 2010

Gardening Freestyle and Pumpkins

I am not much of a disciplinarian. (That sound you hear in the background is my husband guffawing in hearty agreement!) I guess if I had children of my own, I would have developed the skill. However, dogs have been my only children over the years and I have given them alot of latitude.

As I tiptoed through a tangle of canteloupe, watermelon and cucumber vines on my way to tomatoes standing shoulder to shoulder on all sides, I realized that I haven't disciplined my garden this summer either. Case in point ... the pumpkin vine pictured here. This ONE vine has grown into the strawberry patch to the west, tomatoes to the east, compost pile to the north and lawn to the south. I knew pumpkins needed room, but I am amazed at the area this one vine has overtaken.

Every square inch of my garden is covered in something. And I am happy, just like when my dog joins me on the couch! Not having rows anymore does make harvesting a bit trickier -- balancing and stretching in order to reach that ripened vegetable -- but I just consider it multi-tasking ... harvesting while I do my morning workout.

Speaking of pumpkins. Did you know that they have both a male and female blossom on the same plant?! I learned this trivial morsel in an article of the most recent issue of _Hobby Farm_ (a great magazine!). Seems the male blossoms emerge to verify adequate pollination before the female blooms appear. Male blooms have straight stalks while female blooms have a bulb that will grow into the fruit. This picture above shows a pair (the female is right of center with a small, closed, green blossom and the male is to the left with a closed orange blossom).

I harvested my first pumpkin this morning. A beauty, isn't she!

Tuesday, August 10, 2010

Garden Bounty

"Too much to eat and not enough to sell" ... a description I read recently about one's garden harvest that distilled my feelings into exactly the expression that had eluded me. It is exciting to pluck ripened vegetables from the vine -- cantaloupes, tomatoes, squash, peppers, even corn from the 3 stalks the critters did not get -- and disheartening to toss rotting ones that languish on the kitchen counter uneaten. What to do?! I certainly didn't work hard to grow them only to feed the composter!

Several solutions have brought me great joy. The first, and best, solution is to give some away. I hesitated to do this initially as my vegetables were not perfect. The cucumbers were a little big (they delight in playing hiding and seek on the vine); the tomatoes had blemishes; what can one do with just one squash?! Rather than give vegetables that looked like left overs, I wanted to show off my gardening skills with beauties similar to those I select from the grocer's produce stand. But home grown heirloom veges don't look like their genetically-modified, pesticide-laden, greenhouse grown-counterparts. And they don't taste like them either, thankfully. So, I overcame the sins of pride and waste (there are people all over the world starving. How can I throw food away!). Guests to my home now leave with at least something from the garden, perfect or not.

A second solution is to invite friends to dinner. Fresh salsa and chips for appetizers ... the tomatoes, garlic, onion, jalapeƱos, banana and green peppers, and cilantro come from my garden. Sides of tomato pie (my favorite!) with fresh basil; boiled potatoes; squash & onions or squash casserole; lettuce with cucumbers, boiled eggs and homemade croutons. I'm glad the garden motivates me to reconnect with friends.

A third solution is to put up in small quantities. I am mastering the art of canning 3 pints of tomatoes at a time. Waiting until there is a big batch did not work for me. I cut up the ripest and ugliest tomatoes, puree them in the blender (skin and all), stew them down, then water process them for winter enjoyment.

A fourth, and final solution, is to share with the girls, aka chickens. Goats have a reputation for eating anything, but it's the chickens that devour the over-ripened food. A side benefit is that now whenever I approach the chicken run, the new girls sprint to greet me -- feet flying and wings flapping -- instead of cowering in a huddle in fear.

Thursday, April 29, 2010

Iris and Grandmothers, Childhood summers and Friendships

Irises. Intrinsically beautiful in all the colors of the rainbow for which this flower is named. Yet, for me, the value of the irises that grow beside my driveway goes beyond their beauty. They evoke memories of my grandmother who grew them ... and dahlias and hollyhocks, too ... and walking through the garden to her house during childhood summers. I have heard it said that irises are a sign of gardening friends, which is true for me -- the rhizomes for these were given to me by a 90-year old lady a couple of years ago. In a couple more years, I hope to divide this prolific, old-fashioned perinneal and pass the memories along.

Tuesday, April 13, 2010

Watering the Garden

Water. What a precious commodity that I too often take for granted. All I have to do is forget to water my tender seedlings on a hot afternoon to be reminded that every living thing needs water .... and in the proper amount. Neither withered nor drowned is good.

My wonderful husband has designed and built a new irrigation system to deliver water to each square inch of my garden. Furthermore, he placed it on a timer so that a sufficient amount is supplied regularly and consistently. His first design was to deliver the water to the roots, which is preferred. But due to the lay of our land, we could not dig the right depth for a gradual slope down the rows. So Plan B, pictured above, is sprinklers on 6 foot poles in the back and 4 foot poles in the front.

It is helpful to know that most plants require about an inch of water per week. A rain gauge is a vaulable tool for keeping up with that as is the Almanac page of wral.com which gives yesterday's precipitation totals (http://www.wral.com/weather/almanac/).
I hope to plant my seedlings in the garden on Friday, waiting until after mid-April. The potatoes went in yesterday.


I am enjoying my azaleas in full bloom ...


and can't wait for all these Don Juan long-stem red rose buds to open!

 
Spring, my favorite time of year!

Monday, April 5, 2010

Vermicompost: Nature's Organic Fertilizer

As the buckets of composted horse manure were dumped into the bed of our little red truck last week, I noticed a bonus -- lots of worms! I mean, LOTS of worms. The value of my $25 purchase of compost quadrupled instantly in my mind as I recalled seeing red wigglers offered for $25/lb. There were several pounds of worms in the multiple bucketfuls that followed us home on I-540. Granted, these were "common earthworms", not specialized red wigglers, but I knew they would speed the process of turning kitchen scraps into organic fertilizer just the same. So while my wonderful husband shoveled the compost from the truck bed to the garden, I sifted through the dirt still in the truck, rescuing earthworms from the slice of the shovel and beheading by the tiller blades. Some worms needed to go into the garden, so I let them pass and said a little prayer for their safety.

Vermicomposting is one of those homesteading to-do's that kept getting pushed to the bottom of my list. It should be easy to maintain a "worm farm", as my wonderful husband termed it, but I hesitated because I didn't want my ignorance to cause the demise of any creature, even worms. And I have many questions about their care and feeding. But this windfall has brought them to the top of the list ... so here goes.

A Worm Home. In what type of container do worms live best? Height, depth, material, etc. Two years ago, I watched a clip from the Martha Stewart show about vermicomposting. Soon after, I spoke with a local woman who sells worms and told her what I had learned. She quickly informed me that Martha was wrong about using a clear container; worms prefer darkness, so an opaque container is the best choice. I had an old blue Rubbermaid storage container on hand that I used. Holes for air at the top and drainage on the bottom need to be big enough to work but not so large that the worms can escape. The ideal depth of material in which they live is 8-12 inches. I used the compost they were already in for starters. A key factor is moisture ... keeping a good balance between wet enough and not drowning them. The moisture content of a wrung-out sponge is the goal.

Worm Food. http://www.vermicompost.net/ has a list of proper worm foods. They love pumpkin, left over corn cobs (rinsed), watermelon and cantaloupe rinds. They like coffee grounds, tea bags, vegetables, fruits, crushed egg shells and banana peels. I had some of these, so I chopped them into small pieces and mixed them into the soil. Worms tolerate citrus, onions and garlic. I had some of these too, but left them in the compost crock by the sink. It helps to know not to put grass clippings into their home; the clippings get too hot. I had at first thought to add the worms to my fresh goat manure / grass clipping compost pile to speed the process there, but realize now I would have sent them to their deaths.

So they are sequestered in the shade on my screen porch, near the kitchen where the food scraps are. I will need to keep feeding them and spray them with water every now and then to keep the soil appropriately moist. I figure sometime down the road the worms and their castings (poop!) will go into the garden. When that time comes, I'll hold out some worms and start the process all over again.

Saturday, April 3, 2010

March Madness

It's probably heresy to say this in ACC country, but ... March madness to me has to do with gardening, not basketball.  Such a busy month!  And just like the Final Four, the work continues into April. I know others are as busy because my fellow blogging friends have vanished from the online world. They, like I, are tilling, planting, dividing perennials, and caring for baby goats more than blogging. Well, friends, if you have time to read this, know that I miss you and look forward to a rainy day that may give you some inside time to blog!
We have been getting our garden ready. This is a picture of my wonderful husband tilling the composted horse manure into our new, improved (expanded) garden! Nothing like rich black dirt to make winter's planning become a reality. Today we will make the rows and wait for that magical day ... the last frost of the season. My grandfather, who farmed this area all his life, swore never to put anything into the ground before May 1. I'm hoping I can wait until tax day before succumbing to the temptation.
My perky seedlings are thriving in my fabulous greenhouse! Here are the heirloom peas and beans, onions started from the seed of last year's crop, and strawberry runners given a jumpstart in a temperature-controlled environment. The greenhouse is soooo much better than southern exposure window sills of all the foregoing years ... for several reasons: 1) no leggy plants from an inadequate amount of light, 2) no daily turning of the trays so the plants aren't bent toward the sun, and 3) more room for more trays, which means more plants and a larger, staggered harvest.
Perennials like hosta, oregano, mint, Black-eyed Susans and Lamb's Ear have been mercilessly dug up and chopped into halves or thirds. I'm not sure what I am going to do with all the extras. If/When we do move to a farm, I won't need a budget for landscaping as I will have all I need potted and ready to be returned to the earth. And there is something about moving plants with me that gives a new location a sense of history. These hosta came from my mother's yard and I have others that came from the first home Scott and I had when we first got married.
It's another beautiful day outside with blue sky and temperatures forecast to reach mid-80s. Time to go homestead instead of just writing about it. Ta-ta!